Ultimate Arcade Build
Transform an Arcade1Up cabinet into the ultimate emulation machine. Play any console game from Atari to PS2, all in one beautiful arcade cabinet.
The Problem
Remember arcades? The dim lights, the cacophony of bleeps and bloops, the thrill of dropping quarters into machines that promised endless entertainment? Those days are mostly gone. Arcades have closed down, classic consoles are collecting dust, and emulation on a laptop just doesn’t hit the same.
I wanted that arcade experience back. But I didn’t want just one game — I wanted all of them. Every console, every classic arcade cabinet, every childhood memory in one dedicated machine.
So I built one.
What We’re Building
An arcade cabinet that plays:
- Arcade games — MAME, FinalBurn, everything
- Classic consoles — NES, SNES, Genesis, N64, PlayStation, and more
- PC games — Steam, GOG, retro PC titles
- Fighting games — The real reason for this build
The best part? It looks like a legitimate arcade cabinet but plays everything.
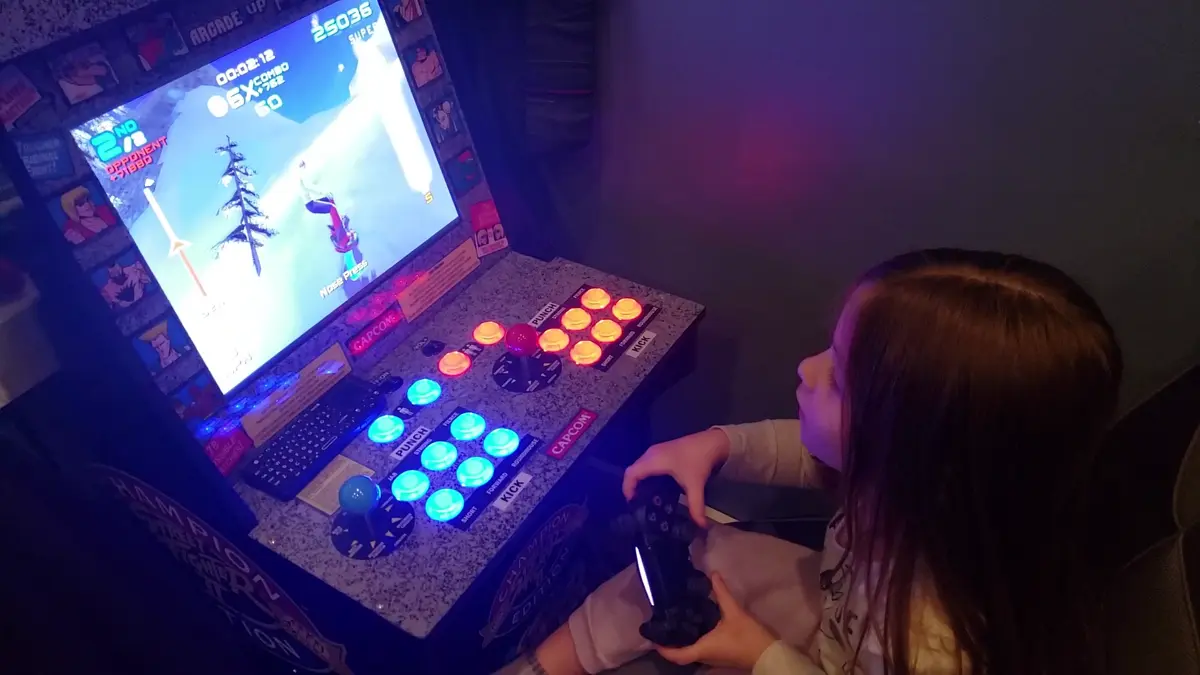
The Hardware
Core Components
| Component | Model | Price (Approx) |
|---|---|---|
| Arcade Cabinet | Arcade1Up Street Fighter II | $200 (used) |
| Emulation PC | Custom mini-ITX build | $400 |
| LCD Controller Board | HDMI-to-LVDS controller | $40 |
| Joysticks | Sanwa JLF | $25 each |
| Buttons | Sanwa OBSF-30 | $3 each |
| USB Encoder | Zero Delay USB Encoder | $15 |
| Speakers | Car speakers + amp | $30 |
| Power Strip | Basic surge protector | $15 |
Total: ~$728
Why Arcade1Up?
The Arcade1Up cabinets are perfect starting points:
- 17” LCD screen (perfect for 4:3 games)
- Pre-cut cabinet shell
- Decent artwork (or replace it)
- Easy to find used
The downside? Stock hardware is garbage. Tiny sound, weak controls, limited game selection. But that’s why we’re gutting it.
The Emulation PC
This is where the magic happens. You don’t need a beast — retro emulation is surprisingly light. I went with:
- CPU: Intel i3-9100 (great for Dreamcast/PS2)
- RAM: 8GB DDR4
- Storage: 256GB SSD (system) + 2TB HDD (games)
- GPU: Integrated graphics (yes, really)
For most retro games, integrated graphics is fine. PS2 and GameCube are the ceiling, and even those run well on modern i3/i5 chips.
The Build Process
Step 1: Gut the Cabinet
Strip everything. The stock electronics go in the trash (or eBay, if you’re feeling generous). Keep:
- The LCD panel
- The cabinet shell
- The marquee (if you like the art)
Step 2: LCD Conversion
The Arcade1Up uses a cheap LCD panel. To drive it with HDMI, you need an LCD controller board. Find your panel’s model number and buy a matching controller.
Connect the controller to the panel’s LVDS connector, wire up power, and boom — you’ve got an HDMI display inside an arcade cabinet.
Step 3: Controls
The stock joysticks and buttons are… okay. If you’re serious about fighting games, upgrade to Sanwa or Seimitsu parts.
Wire the controls through a USB encoder. The “Zero Delay” encoders are cheap and work perfectly with emulators — they show up as generic gamepads.
Step 4: Audio
Car speakers wired to a cheap amp, fed from the PC’s headphone jack. It’s not audiophile, but arcade games aren’t meant to be.
Mount the speakers behind the marquee for that authentic top-firing sound.
Step 5: Software
I use Batocera — a Linux-based emulation OS that boots straight into a game selection menu. It supports:
- MAME
- RetroArch cores for every console imaginable
- Steam (with some tweaking)
- Custom controller mappings
Configure once, and it’s appliance-simple. Power on, pick a game, play.
Performance
| System | Status | Notes |
|---|---|---|
| Arcade (MAME) | Perfect | 60fps on everything |
| NES/SNES/Genesis | Perfect | Zero issues |
| N64 | Great | Most games run well |
| PlayStation 1 | Perfect | 100% compatibility |
| PlayStation 2 | Good | ~90% playable |
| Dreamcast | Great | Most games hit 60fps |
| GameCube | Decent | Lighter games work |
The 17” screen is 4:3, which means classic games fill the display without stretching. It’s chef’s kiss.
Games We Play
Marvel vs. Capcom 2 is why I built this. The Dreamcast version through Flycast runs beautifully, and local multiplayer is where this machine shines.
Other favorites:
- Street Fighter III: 3rd Strike
- Tekken 3
- The Simpsons Arcade
- TMNT: Turtles in Time
- Marvel Super Heroes
- X-Men vs. Street Fighter
Lessons Learned
Measure twice, cut once. I ruined a button hole by drilling without checking clearance. Wood filler can only do so much.
Buy more buttons than you think you need. You’ll want 6 buttons per player for fighting games, plus start/select/coin buttons. Running out mid-build is frustrating.
Test your controller mapping early. Spend time getting the controls right. It’s the difference between “fun” and “frustrating.” Fixing mapping issues after everything is assembled is a nightmare.
Don’t skimp on the power supply. A clean power strip with surge protection will save your bacon when (not if) you get a power spike.
Cooling matters in enclosed cabinets. Add a small fan to keep air moving. The PC generates heat, and arcade cabinets aren’t known for ventilation.
Future Upgrades
- Light gun support — AimTrak or Sinden for Time Crisis vibes
- Coin mech — Because nothing beats inserting a real token
- Bigger drive — My 2TB is filling up with PS2 games
- RGB lighting — It’s an arcade, it needs blinky lights
Conclusion
This build took a weekend and cost less than a modern console. But the fun I’ve had playing Marvel vs. Capcom 2 with friends? Priceless.
There’s something magical about standing in front of an arcade cabinet, joystick in hand, about to throw down. You don’t get that from a laptop. This build brought the arcade home.
If you’re even slightly interested in retro gaming, build one. The arcade1Up cabinets are cheap starting points, and the satisfaction of playing your childhood favorites on real arcade controls is unmatched.
Questions? Hit me up on the contact page — I’m always happy to talk arcade builds.

Comments
Powered by GitHub Discussions