NetBox IPAM/DCIM for Homelabs: Your Infrastructure's Source of Truth
Learn how NetBox can transform your homelab documentation with powerful IPAM and DCIM capabilities
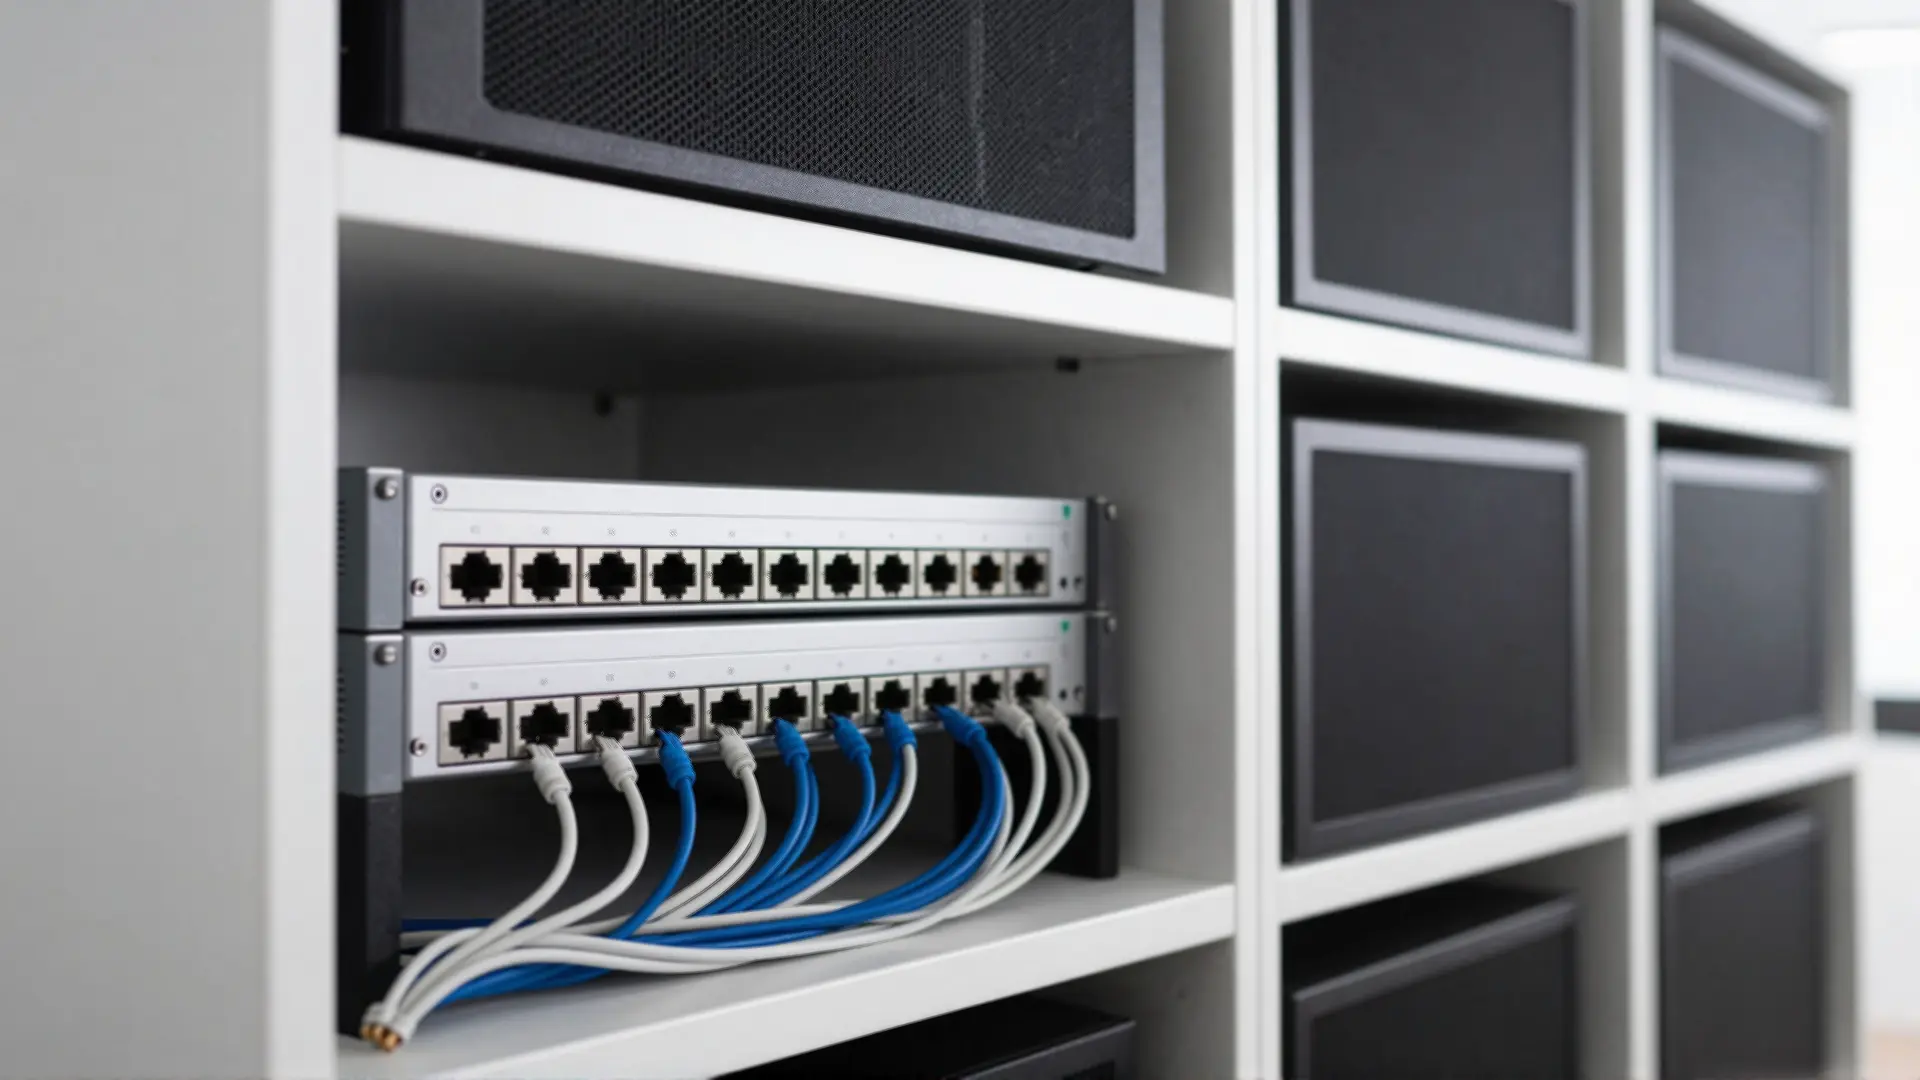
Table of Contents
- What is NetBox?
- The Two Pillars: IPAM and DCIM
- Key Features for Homelabers
- IP Address Tracking That Actually Works
- Device Inventory with Component Tracking
- Visual Rack Elevations
- Virtual Machines and Containers
- Cable and Connection Management
- Installation Guide: Docker Deployment
- Prerequisites
- Step-by-Step Installation
- What Gets Deployed
- Persistence and Backups
- Integration Possibilities
- Proxmox Integration
- Ansible Dynamic Inventory
- Other Integrations
- Best Practices
- Data Organization
- Naming Conventions
- Regular Maintenance
- API Pagination
- Security Considerations
- Why NetBox Over Alternatives?
- Conclusion
If you’ve ever spent twenty minutes trying to remember which IP address you assigned to that one container three months ago, or scrambled to find a serial number when a drive fails, you’re not alone. Homelab documentation tends to live in scattered spreadsheets, text files, and—if we’re being honest—pure memory that fades faster than we’d like.
There’s a better way. NetBox gives you a single source of truth for your entire infrastructure, combining IP address management (IPAM) and data center infrastructure management (DCIM) in one self-hosted package. Let’s explore why this matters and how to get it running in your homelab.
What is NetBox?
NetBox is an open-source web application designed specifically for modeling and documenting network infrastructure. Think of it as your infrastructure’s “intended state” database—that is, how your network should be configured, not just what’s currently connected.
Unlike monitoring tools that show you what’s happening right now, NetBox answers questions like:
- What IP addresses did I reserve for my Kubernetes cluster?
- Which switch port connects to my NAS?
- Where is that VM physically hosted?
- How much rack space do I have left?
The Two Pillars: IPAM and DCIM
NetBox combines two critical capabilities under one roof:
IPAM (IP Address Management) handles everything related to addressing. This includes tracking IP prefixes, individual IP addresses, VLANs, VRFs (Virtual Routing and Forwarding), and even AS numbers. You get a hierarchical view of your address space with automatic utilization tracking.
DCIM (Data Center Infrastructure Management) manages your physical and virtual assets. Regions, sites, racks, devices, cables, power distribution—it’s all there. You can model your server rack visually, track cable connections end-to-end, and maintain an accurate inventory of every piece of hardware.
The magic happens when these two work together. A device in DCIM has interfaces, those interfaces have IPs, and those IPs belong to prefixes in specific VLANs. Everything connects, giving you a complete picture of your infrastructure.
Key Features for Homelabers
NetBox offers a feature set that scales from a single-node homelab to enterprise data centers. Here’s what matters most for home deployments:
IP Address Tracking That Actually Works
You probably have IP addresses scattered across your network: your router’s DHCP assignments, static IPs for servers, container networks, IoT devices, and maybe a separate range for guests. NetBox centralizes all of this with:
- Automatic provisioning — Request the next available IP in a prefix
- VRF support — Isolate networks like VPN clients, IoT segments, or lab environments
- Prefix hierarchy — Visual tree showing subnet utilization at a glance
- VLAN management — Group and organize VLANs by site, role, or any criteria
Gone are the days of “I think that IP is free… let me check everything and hope.”
Device Inventory with Component Tracking
Every device in NetBox can have detailed specifications: device type, manufacturer, serial number, asset tag, role, and location. But it goes deeper—component templates let you define what a Dell PowerEdge R730 looks like: how many drive bays, which NICs, which power supplies.
When you create a device from that template, all components are pre-populated. Need to track which port has the SFP+ adapter? It’s there.
Visual Rack Elevations
NetBox generates SVG rack layouts showing exactly where each device sits. At a glance, you can see:
- Which U positions are occupied
- Device depth and orientation
- Rack space remaining
- Front vs. rear mounting
This is surprisingly useful when you’re planning expansion or explaining to someone where a problem device is physically located.
Virtual Machines and Containers
Your homelab probably isn’t just physical hardware. NetBox tracks VMs and can link them to physical hosts. While container tracking typically requires plugins or custom scripts, the API makes it straightforward to push container inventory into NetBox.
Cable and Connection Management
NetBox lets you document every cable run. Want to know exactly which switch port connects to which server? Which cable goes through which patch panel? It’s all there, searchable and traceable.
Installation Guide: Docker Deployment
Docker is the recommended deployment method for homelabs. It’s clean, reproducible, and easy to backup. Here’s how to get NetBox running:
Prerequisites
| Requirement | Details |
|---|---|
| Host OS | Linux (Ubuntu works great) |
| RAM | Minimum 2GB |
| CPU | 2 cores minimum |
| Storage | 20GB+ for database growth |
| Software | Docker and Docker Compose |
Step-by-Step Installation
# Clone the official NetBox Docker repository
git clone -b release https://github.com/netbox-community/netbox-docker.git
cd netbox-docker

# Create override file for custom port mapping
cp docker-compose.override.yml.example docker-compose.override.yml
Edit docker-compose.override.yml to expose the service:
services:
  netbox:
    ports:
      - "8000:8080"
Now continue with the setup:
# Pull all required images
docker compose pull

# Start the stack
docker compose up -d

# Create your admin user
docker compose exec netbox python3 /opt/netbox/netbox/manage.py createsuperuser
Access NetBox at http://your-server:8000 and log in with your new admin account.
Tip: NetBox generates a random secret key on first run. For production use, generate your own with:
python3 -c "import secrets; print(secrets.token_urlsafe(50))"
What Gets Deployed
The Docker stack includes everything you need:
| Container | Purpose |
|---|---|
| netbox | Main web application |
| netbox-worker | Background task processing |
| postgres | PostgreSQL database |
| redis | Cache and task queue |
| nginx | Reverse proxy |
Persistence and Backups
NetBox stores data in Docker volumes. Back these up regularly:
# List your volumes
docker volume ls | grep netbox

# Backup the PostgreSQL database
docker compose exec postgres pg_dump -U netbox netbox > netbox_backup_$(date +%Y%m%d).sql
Storage volumes also let you snapshottable backup strategies if your host supports it.
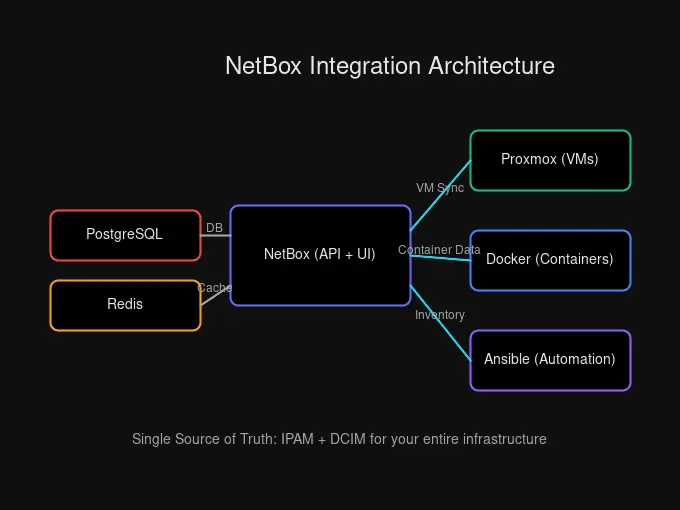
Integration Possibilities
NetBox isn’t a walled garden. Its REST API and GraphQL interfaces make it a hub for automation workflows.
Proxmox Integration
If you’re running Proxmox, several tools sync VM inventory to NetBox:
| Tool | What It Syncs |
|---|---|
| Netbox-Proxbox | VMs, nodes, clusters |
| netbox-pve-sync | VMs, disks, IPs, MACs, VLANs |
The workflow can even work in reverse: define a VM in NetBox, trigger a webhook, and have Ansible create it in Proxmox automatically.
Ansible Dynamic Inventory
The official netbox.netbox Ansible collection lets you use NetBox as a dynamic inventory source. Your playbooks automatically pull hosts, groups, and variables from NetBox without static inventory files.
# ansible.cfg
[inventory]
enable_plugins = netbox.netbox.nb_inventory

# inventory/netbox.yml
plugin: netbox.netbox.nb_inventory
api_endpoint: http://netbox:8000
token: your-api-token
Other Integrations
- Monitoring systems — Feed NetBox data into Grafana dashboards
- Terraform — Use the NetBox provider for infrastructure-as-code
- Custom scripts — Python, Go, PowerShell—anything that speaks REST or GraphQL
Note: NetBox is deliberately not an auto-discovery tool. It’s designed as the source of truth, not a passive observer. Plugins can add discovery capabilities, but the core philosophy is: you tell NetBox what should exist, and automation enforces that state.
Best Practices
Data Organization
Start with a clear hierarchy. Even if you only have one location, define your regions and sites:
Region: Home
└── Site: Main Office
    └── Rack: Rack-A
        ├── Device: pve-node-01
        ├── Device: pve-node-02
        └── Device: switch-core
This scales naturally when you add a second rack or location.
Naming Conventions
Stick to consistent naming for everything:
- Devices:
pve-node-01,rpi-utility - Prefixes:
10.10.10.0/24for services,10.10.20.0/24for IoT - VLANs: Use IDs and names that match your switch config
Document your conventions and follow them everywhere.
Regular Maintenance
NetBox works best when kept current:
- Update device status when decommissioning hardware
- Mark IPs as reserved or assigned
- Keep VM assignments accurate
- Review and update configurations periodically
API Pagination
When pulling data via API, always use pagination:
# Good: paginate requests
response = requests.get(
    "http://netbox:8000/api/ipam/ip-addresses/",
    params={"limit": 100, "offset": 0},
    headers={"Authorization": f"Token {API_TOKEN}"}
)
The maximum limit is 1000, but 100 is faster for most operations.
Security Considerations
- Use HTTPS in production (reverse proxy with Let’s Encrypt)
- Rotate API tokens regularly
- Create service accounts with minimal permissions
- Set appropriate
ALLOWED_HOSTSto prevent host header attacks
Why NetBox Over Alternatives?
You might be wondering why not just use a spreadsheet or one of the simpler IPAM tools.
| Feature | NetBox | phpIPAM | Spreadsheet |
|---|---|---|---|
| DCIM built-in | ✅ | ❌ | Manual |
| REST API | ✅ | ✅ | ❌ |
| GraphQL | ✅ | ❌ | ❌ |
| Cable tracing | ✅ | ❌ | Manual |
| VM tracking | ✅ | Basic | Manual |
| Self-hosted | ✅ | ✅ | N/A |
For homelabs that want serious documentation without enterprise costs, NetBox hits the sweet spot. phpIPAM is simpler if you only need IP tracking, but you’ll outgrow it quickly when you want device context.
Conclusion
NetBox transforms homelab documentation from “whatever I can remember and scattered notes” into an organized, queryable, automation-ready system. It’s self-hosted, free, maintained by an active community, and surprisingly pleasant to use.
The real value emerges over time. When you need to answer “what IP did I assign to that service?” or “which switch port is problematic?”, it’s one search away. When you want to automate provisioning, you have an API to query. When someone asks about your network setup, you have a visual model to show them.
Start small. Install it, add your critical infrastructure, and let it grow organically. Before long, you’ll wonder how you managed without a proper source of truth.
Your future self will thank you.


Comments
Powered by GitHub Discussions