MinIO Object Storage for Homelabs
Set up S3-compatible object storage with MinIO for your homelab. Learn installation, bucket management, and integration with self-hosted apps.

Table of Contents
- Why MinIO?
- Installing MinIO
- Docker (Simplest)
- Bare Metal
- Kubernetes
- Bucket Basics
- Creating Buckets
- Uploading and Downloading
- Bucket Policies
- Security and Access Control
- Root Credentials
- Creating Users and Service Accounts
- Service Accounts for Applications
- Homelab Use Cases
- Application Data Storage
- Proxmox Backup Server
- Docker Registry Backend
- Restic Backup Target
- Monitoring with Prometheus
- Performance Tuning
- Erasure Coding Explained
- Hardware Recommendations
- Scaling Up
- A Complete Example: Media Server Stack
- Getting Started Checklist
- Wrapping Up
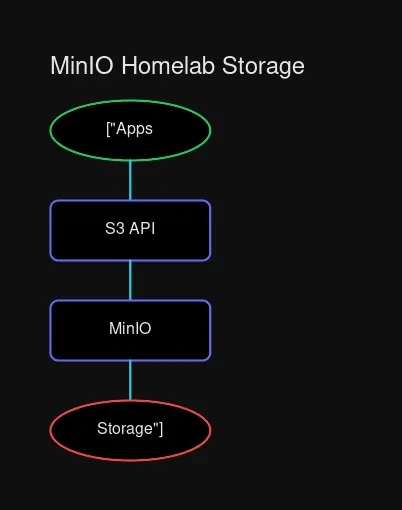 MinIO sits between your applications and storage, providing a unified S3-compatible API.
Why MinIO?
Running a homelab means managing data. Photos from Immich, backups from Proxmox, Docker volume data, CI/CD artifacts—it all needs somewhere to live. You could scatter files across your servers, or you could use proper object storage.
MinIO is an S3-compatible object store that runs entirely on your hardware. It’s fast, lightweight, and plays nice with just about every self-hosted application. If you’ve ever wanted AWS S3 in your basement, this is it.
S3 is the de facto standard for object storage. Every major cloud provider offers it, and most self-hosted applications speak it natively. MinIO gives you that same API without the cloud bill or the data leaving your network.
The benefits:
- S3 Compatibility: Applications that work with AWS S3 work with MinIO. No code changes, no adapters.
- Performance: MinIO is built for throughput. On proper hardware, it can saturate network links that would make cloud storage jealous.
- Erasure Coding: Data protection without RAID arrays. Lose a drive? MinIO rebuilds from parity.
- Single Binary: No dependencies, no databases to maintain. Just run it.
- Kubernetes Native: First-class support for container orchestration with the MinIO Operator.
For homelabs, this means one storage solution for everything: application data, backups, media, and more.
Installing MinIO
You have three main deployment paths. Pick the one that matches your infrastructure.
Docker (Simplest)
The quickest path to running MinIO:
docker run -d \
  --name minio \
  -p 9000:9000 \
  -p 9001:9001 \
  -v ~/minio-data:/data \
  -e MINIO_ROOT_USER=admin \
  -e MINIO_ROOT_PASSWORD=YourStrongPassword \
  quay.io/minio/minio server /data --console-address ":9001"
This gives you:
- Port 9000: S3 API endpoint
- Port 9001: Web console
Open http://localhost:9001 and log in with the credentials you set. You’ll see a clean interface for creating buckets, uploading files, and managing access.
Bare Metal
For dedicated servers without container overhead:
# Download the binary
wget https://dl.min.io/server/minio/release/linux-amd64/minio
chmod +x minio
sudo mv minio /usr/local/bin/

# Create data directory
sudo mkdir -p /data/minio
sudo chown $USER:$USER /data/minio

# Set credentials and run
export MINIO_ROOT_USER=admin
export MINIO_ROOT_PASSWORD=YourStrongPassword
minio server /data/minio --console-address ":9001"
For production setups, create a systemd service:
# /etc/systemd/system/minio.service
[Unit]
Description=MinIO Object Storage
After=network.target

[Service]
User=minio
Group=minio
EnvironmentFile=/etc/minio/minio.conf
ExecStart=/usr/local/bin/minio server $MINIO_VOLUMES --console-address ":9001"
Restart=always

[Install]
WantedBy=multi-user.target
Kubernetes
If you’re running k8s, the MinIO Operator is your friend:
# Install the operator
kubectl apply -k "github.com/minio/operator?ref=v7.0.1"

# Create namespace
kubectl create namespace minio

# Deploy a tenant
kubectl apply -f - <<EOF
apiVersion: minio.min.io/v2
kind: Tenant
metadata:
  name: homelab-storage
  namespace: minio
spec:
  image: quay.io/minio/minio:RELEASE.2024-10-02T17-50-41Z
  requestAutoCert: true
  pools:
    - name: pool-0
      servers: 1
      volumesPerServer: 4
      volumeClaimTemplate:
        spec:
          accessModes:
            - ReadWriteOnce
          resources:
            requests:
              storage: 100Gi
          storageClassName: local-path
EOF
The operator handles TLS certificates, scaling, and lifecycle management automatically.
Bucket Basics
Buckets are containers for your objects. Think of them as top-level folders, but with policy controls.
Creating Buckets
Via the web console, click “Create Bucket” and give it a name. Or use the CLI:
# Install mc (MinIO Client)
wget https://dl.min.io/client/mc/release/linux-amd64/mc
chmod +x mc
sudo mv mc /usr/local/bin/

# Configure connection
mc alias set homelab http://localhost:9000 admin YourStrongPassword

# Create bucket
mc mb homelab/backups
mc mb homelab/photos
mc mb homelab/docker-registry
Uploading and Downloading
# Single file
mc cp my-backup.tar.gz homelab/backups/

# Entire directory
mc mirror ./local-photos homelab/photos/

# Download
mc cp homelab/backups/my-backup.tar.gz ./restored-backup.tar.gz

# Recursive download
mc mirror homelab/photos ./downloaded-photos/
Bucket Policies
Make a bucket public for static files:
# Allow anonymous download access
mc anonymous set download homelab/static-assets

# Or more granular control
mc anonymous set none homelab/private-data
For fine-grained ACLs, you’ll want IAM policies—which brings us to security.
Security and Access Control
Root Credentials
The MINIO_ROOT_USER and MINIO_ROOT_PASSWORD environment variables define your admin account. Change them from the defaults. They grant full access to everything.
# Strong example
export MINIO_ROOT_USER=homelab-admin
export MINIO_ROOT_PASSWORD=$(openssl rand -base64 32)
Don’t use root credentials for applications. Create dedicated service accounts instead.
Creating Users and Service Accounts
# Create a user for backups
mc admin user add homelab backup-user BackupPassword123

# Create a policy for backup access
mc admin policy add homelab backup-policy backup-policy.json

# Attach policy to user
mc admin policy attach homelab backup-policy --user backup-user
A minimal backup policy:
{
  "Version": "2012-10-17",
  "Statement": [
    {
      "Effect": "Allow",
      "Action": [
        "s3:PutObject",
        "s3:GetObject",
        "s3:DeleteObject",
        "s3:ListBucket"
      ],
      "Resource": [
        "arn:aws:s3:::backups",
        "arn:aws:s3:::backups/*"
      ]
    }
  ]
}
Service Accounts for Applications
For apps like Nextcloud or Immich, create service accounts rather than sharing credentials:
# Generate access keys for an app
mc admin user svcacct add homelab admin \
  --name "immich-storage" \
  --expiry 365d
This outputs an access_key and secret_key you configure in your application’s storage settings. The account can be revoked or rotated without affecting other services.
Homelab Use Cases
Application Data Storage
Most self-hosted apps support S3 storage. Instead of storing files on local disks (which complicates backups and migrations), point them at MinIO:
Paperless-ngx:
# docker-compose.yml
environment:
  - PAPERLESS_TIKA_ENABLED=1
  - PAPERLESS_S3_ENDPOINT=http://minio:9000
  - PAPERLESS_S3_ACCESS_KEY=${MINIO_ACCESS_KEY}
  - PAPERLESS_S3_SECRET_KEY=${MINIO_SECRET_KEY}
  - PAPERLESS_S3_BUCKET=paperless
Immich: Configure external storage in the admin panel. Point UPLOAD_LOCATION to an S3 bucket.
Nextcloud: Enable the External Storage app and add an S3 backend pointing at MinIO.
Proxmox Backup Server
Proxmox Backup Server can store backups on any S3-compatible storage:
# In Proxmox Backup Server
proxmox-backup-manager datastore create minio-backups \
  --backend s3 \
  --endpoint http://minio:9000 \
  --bucket pve-backups \
  --access-key ${ACCESS_KEY} \
  --secret-key ${SECRET_KEY}
Docker Registry Backend
Run your own container registry with MinIO as the storage backend:
# docker-compose.yml
services:
  registry:
    image: registry:2
    environment:
      REGISTRY_STORAGE_S3_REGIONENDPOINT: http://minio:9000
      REGISTRY_STORAGE_S3_BUCKET: registry
      REGISTRY_STORAGE_S3_ACCESSKEY: ${MINIO_ACCESS_KEY}
      REGISTRY_STORAGE_S3_SECRETKEY: ${MINIO_SECRET_KEY}
      REGISTRY_STORAGE_S3_REGION: local
Restic Backup Target
For system-level backups:
# Initialize repository
restic init -r s3:http://minio:9000/server-backups

# Set credentials
export AWS_ACCESS_KEY_ID=${MINIO_ACCESS_KEY}
export AWS_SECRET_ACCESS_KEY=${MINIO_SECRET_KEY}

# Run backup
restic backup -r s3:http://minio:9000/server-backups /home /etc
Monitoring with Prometheus
MinIO exports Prometheus metrics:
# prometheus.yml
scrape_configs:
  - job_name: 'minio'
    metrics_path: /minio/v2/metrics/cluster
    static_configs:
      - targets: ['minio:9000']
Grafana dashboards are available in the MinIO repository for visualizing these metrics.
Performance Tuning
Erasure Coding Explained
MinIO uses erasure coding for data protection. It splits objects into data shards and parity shards across drives. Lose some drives, still recover your data.
Minimum configuration: 4 drives gives you single-drive failure tolerance.
Recommended: 8+ drives with EC:4 (can lose any 4 drives).
The math works out better than RAID6—you get more usable space and faster rebuilds.
Hardware Recommendations
- Drive type: NVMe SSDs for maximum throughput. SATA SSDs for good balance. HDDs work but limit throughput.
- Drive count: Multiples of 4 (erasure coding requires it).
- Network: 10GbE or faster lets MinIO stretch its legs.
- Memory: 1GB minimum, more for larger deployments. MinIO caches metadata in RAM.
Scaling Up
Single-node MinIO handles impressive loads. When you outgrow one server:
- Add drives: Stop the server, add drives, update
MINIO_VOLUMES, restart. MinIO redistributes data. - Add servers: For distributed mode, point multiple servers at the same cluster definition.
Distributed MinIO runs across nodes, providing both capacity growth and fault tolerance beyond what any single server can offer.
A Complete Example: Media Server Stack
Here’s a docker-compose that runs MinIO alongside typical homelab services:
version: '3.8'

services:
  minio:
    image: quay.io/minio/minio:latest
    container_name: minio
    environment:
      MINIO_ROOT_USER: admin
      MINIO_ROOT_PASSWORD: ${MINIO_ROOT_PASSWORD}
    volumes:
      - minio-data:/data
    ports:
      - "9000:9000"
      - "9001:9001"
    command: server /data --console-address ":9001"
    restart: unless-stopped

  # Immich with S3 backend
  immich-server:
    image: ghcr.io/immich-app/immich-server:release
    environment:
      - DB_HOSTNAME=postgres
      - REDIS_HOSTNAME=redis
      - UPLOAD_LOCATION=s3://minio:9000/immich
    depends_on:
      - minio
      - postgres
      - redis

  # Paperless with S3 backend
  paperless:
    image: ghcr.io/paperless-ngx/paperless-ngx:latest
    environment:
      - PAPERLESS_S3_ENDPOINT=http://minio:9000
      - PAPERLESS_S3_BUCKET=paperless
    depends_on:
      - minio

volumes:
  minio-data:
    driver: local
One MinIO instance. Multiple services. Consolidated backups.
Getting Started Checklist
- Deploy MinIO via Docker, binary, or Kubernetes
- Change default credentials to something strong
- Create buckets for each service (photos, documents, backups, etc.)
- Generate service accounts for each application
- Configure your apps to use S3 endpoints pointing at MinIO
- Set up backups of your MinIO data (either S3 replication or periodic snapshots)
- Monitor disk usage and drive health via Prometheus/Grafana
Wrapping Up
MinIO brings enterprise-grade object storage into your homelab. It’s not just a file server—it’s the storage layer that makes your self-hosted stack feel cohesive. One API, consistent tooling, and total control over your data.
For most homelabs, start with Docker and a single server. Add drives as your data grows. Graduate to Kubernetes + MinIO Operator if you’re running container orchestration already. The S3 compatibility means every migration path stays open.
Your photos, your backups, your documents. On your hardware. No cloud subscription required.


Comments
Powered by GitHub Discussions