Build Your Own Ambilight: WLED + ESP32 + Hyperion Ambient Lighting Guide
Transform your TV viewing experience with DIY ambient lighting. Complete guide to setting up WLED, ESP32, and Hyperion for immersive bias lighting.
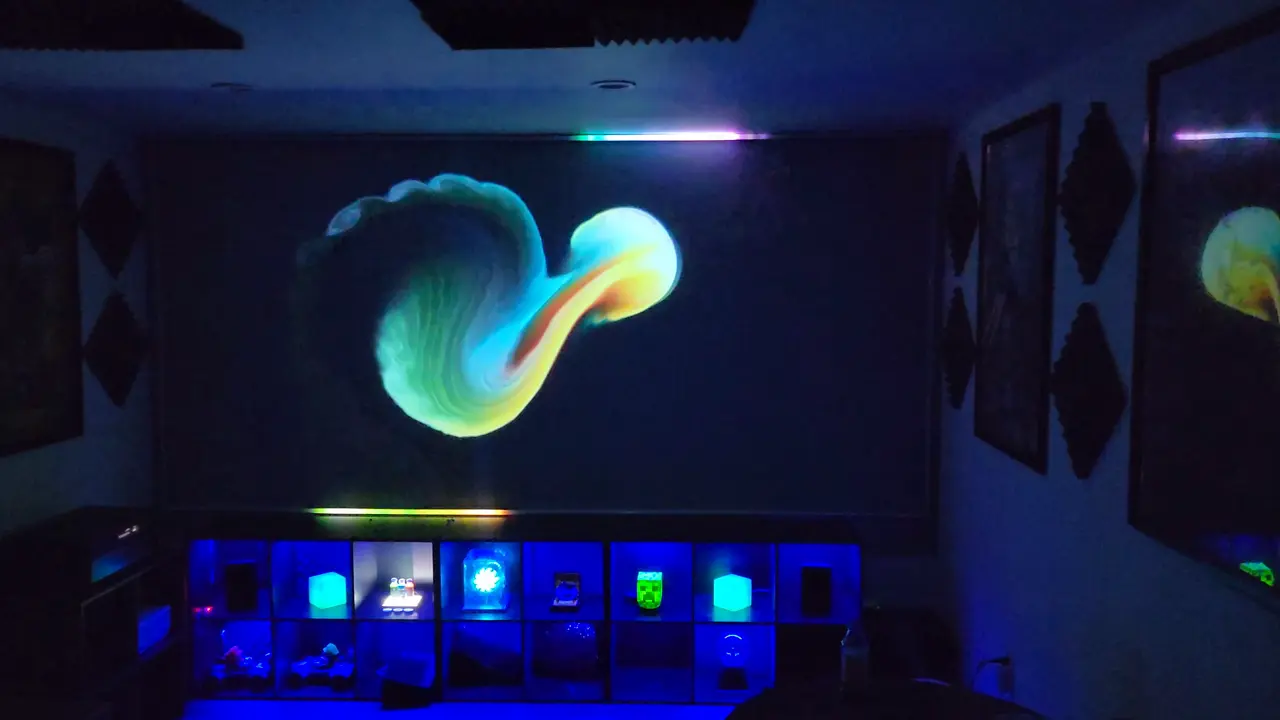
Table of Contents
- What You’ll Build
- How It Works
- Hardware Shopping List
- Budget Build (~$40-60)
- Mid-Range Build (~$60-100)
- Premium Build (~$100-200)
- Which LED Strip Should You Choose?
- Wiring It All Together
- The Basic Circuit
- Connection Reference
- With Level Shifter (Recommended)
- Power Requirements
- Step 1: Flash WLED to Your ESP32
- Web Installer Method
- Initial WLED Configuration
- Calculating LED Count
- Step 2: Install and Configure Hyperion
- Installation Options
- Connect Hyperion to WLED
- Configure LED Layout
- Set Up Screen Capture
- Step 3: Fine-Tuning Your Setup
- Color Calibration
- Fixing Wrong Colors
- WLED Settings for Hyperion Mode
- Adjust for Lag
- Troubleshooting Common Issues
- LEDs Not Lighting At All
- Random Flickering or Wrong Colors
- Hyperion Can’t Connect to WLED
- Colors Don’t Match What’s On Screen
- Going Further
- HDMI Sources (Game Consoles, Blu-ray)
- Multiple LED Setups
- Audio Reactive LEDs
- My Setup (From The Video)
- Quick Reference
- Essential WLED Settings for Hyperion
- Essential Hyperion Settings
- Resources
- Wrapping Up
Want that immersive Philips Ambilight effect without the Philips price tag? This guide walks you through building your own ambient TV lighting system using WLED, an ESP32 microcontroller, and Hyperion. It’s the exact setup I show in the video above — affordable, customizable, and seriously cool.
What You’ll Build
Ambient lighting (also called bias lighting) projects colors from your screen onto the wall behind your TV, creating an immersive viewing experience that:
- Reduces eye strain by softening the contrast between bright screens and dark rooms
- Extends perceived screen size by bleeding colors onto the wall
- Looks amazing for movies, games, and everything in between
How It Works
┌─────────────┐      ┌─────────────┐      ┌─────────────┐      ┌─────────────┐
│   Screen    │──────│  Hyperion   │──────│    WLED     │──────│  LED Strip  │
│  (Content)  │  →   │ (Captures)  │  →   │ (Controls)  │  →   │  (Lights)   │
└─────────────┘      └─────────────┘      └─────────────┘      └─────────────┘
PC/TV PC/RPi ESP32 Behind TV- Hyperion runs on your computer (or Raspberry Pi) and captures what’s displayed on screen
- Hyperion processes the image and determines what color each LED should show
- Hyperion sends that data over your network to WLED running on an ESP32
- WLED tells the LED strip exactly what colors to display
- Boom — ambient lighting synced to your content
Hardware Shopping List
Budget Build (~$40-60)
Perfect for starting out. Uses 5V LEDs and a basic ESP32.
| Item | Specification | Est. Price |
|---|---|---|
| LED Strip | WS2812B 5V, 60 LEDs/m, 2-3m | $12-18 |
| ESP32 Board | ESP32 DevKit V1 | $6-10 |
| Power Supply | 5V 10A switching supply | $8-12 |
| Level Shifter | SN74AHCT125 module | $2-4 |
| Jumper Wires | Female-to-female, various lengths | $3-5 |
| DC Barrel Jack | For power supply connection | $2-4 |
Total: ~$33-53
Save yourself headaches later — buy a level shifter. The ESP32 outputs 3.3V signals while WS2812B LEDs expect 5V data. Without a level shifter, you’ll get random flickering and color glitches, especially on longer runs.
Mid-Range Build (~$60-100)
12V LEDs with backup data line. More reliable for larger setups.
| Item | Specification | Est. Price |
|---|---|---|
| LED Strip | WS2815 12V, 60 LEDs/m, 3m | $25-35 |
| ESP32 Board | QuinLED-Dig-Uno (includes level shifter) | $20-25 |
| Power Supply | 12V 5A (quality brand) | $12-18 |
| Corner Connectors | For clean TV mounting | $5-8 |
| Cabling | High-quality silicone cables | $5-8 |
Total: ~$67-94
Premium Build (~$100-200)
For large TVs (65”+) or if you want the cleanest installation.
| Item | Specification | Est. Price |
|---|---|---|
| LED Strip | WS2815 12V, 60 LEDs/m, 4-5m | $40-60 |
| ESP32 Board | QuinLED-Dig-Quad (4 outputs) | $30-40 |
| Power Supply | 12V 10A industrial grade | $20-30 |
| HDMI Capture Card | USB (for external sources like game consoles) | $15-25 |
| Aluminum Channels | LED diffusers for cleaner look | $20-35 |
| Corner Pieces | Flexible silicone connectors | $8-12 |
Total: ~$133-202
Which LED Strip Should You Choose?
| Use Case | Recommended Strip | Why |
|---|---|---|
| Small monitor (24”) | WS2812B, 30 LEDs/m, 2m | Lower power, cheaper |
| Medium TV (40-55”) | WS2812B, 60 LEDs/m, 3m | Good density, affordable |
| Large TV (65”+) | WS2815, 60 LEDs/m, 4-5m | 12V reliability, backup data line |
| Bright room | APA102/SK9822 | Higher brightness, clock line |
| Color accuracy | SK6812 RGBW | Dedicated white channel |
WS2815 vs WS2812B: The WS2815 runs at 12V and has a backup data line. If one LED fails, the rest keep working. For the small price difference, it’s worth it for a TV setup you’ll use daily.
Wiring It All Together
The Basic Circuit
                    ┌─────────────────┐
                    │     ESP32       │
                    │                 │
Power Supply ───────│ GND        GPIO │────── Data In ──────► LED Strip GND
   5V/12V       │   │                 │                      │
   GND ─────────┼───│ GND             │                      │
                │   │                 │                      │
   +5V/+12V ────┼───│ (not connected) │                      │
                │   └─────────────────┘                      │
                │                                            │
                └────────────────────────────────────────────┘
                          Power to LED Strip
Connection Reference
| From | To | Wire Color (suggested) |
|---|---|---|
| Power Supply + | LED Strip VIN (+) | Red |
| Power Supply - | LED Strip GND (-) | Black |
| Power Supply - | ESP32 GND | Black (critical!) |
| ESP32 GPIO 16 | LED Strip Data In (DI) | Any color |
Never power more than a few LEDs directly from the ESP32! The ESP32’s 5V pin can only supply around 500mA. A 60-LED strip at full white draws 3.6A (60 × 60mA). Always use an external power supply for the LEDs.
With Level Shifter (Recommended)
ESP32 GPIO ─────► Level Shifter Input (3.3V side)
ESP32 3.3V ─────► Level Shifter VCC (Low side)
LED Strip 5V ───► Level Shifter VCC (High side)
Level Shifter Output ───► LED Strip Data In
All GNDs connected together
Power Requirements
Each WS2812B LED draws up to 60mA at full white brightness.
Formula: Total Amps = Number of LEDs × 0.06
| LED Count | Recommended Supply | Minimum Wattage |
|---|---|---|
| 60 LEDs (1m @ 60/m) | 5V 4A | 20W |
| 144 LEDs (2.4m) | 5V 10A | 50W |
| 180 LEDs (3m) | 5V 12A | 60W |
| 300 LEDs (5m) | 5V 18A | 90W |
Power injection matters for strips longer than 2-3 meters. Connect power at the start AND end of the strip. For very long runs, inject power every 2-3 meters. This prevents voltage drop that causes LEDs to flicker or show wrong colors at the far end.
Step 1: Flash WLED to Your ESP32
The easiest method is the web-based installer — no command line needed.
Web Installer Method
- Open Chrome or Edge browser (Web Serial support required)
- Go to install.wled.me
- Connect your ESP32 via USB
- Click “Connect” and select your ESP32’s COM port
- Click “Install WLED” and wait for the flash to complete
- When done, connect to the “WLED-AP” WiFi network
- Configure your home WiFi credentials in the popup
The default WLED access point password is wled1234. After connecting, note the IP address assigned to your ESP32 — you’ll need it for Hyperion configuration.
Initial WLED Configuration
Once connected to your network:
- Open a browser and go to the ESP32’s IP address (or
wled-xxxxxx.local) - Click Config → LED Preferences
- Set up your LEDs:
| Setting | Value |
|---|---|
| LED Count | Your total number of LEDs (measure your TV perimeter) |
| GPIO | 16 (or whichever pin you wired) |
| LED Type | WS2812B (or your strip type) |
| Color Order | GRB (most common, adjust if colors are wrong) |
- Enable Automatic brightness limiter and set max current to ~80% of your power supply rating
- Click Save
Calculating LED Count
Measure your TV:
Example for 55" TV:
- Width: 48" (121 cm)
- Height: 27" (69 cm)
- Perimeter: 48+48+27+27 = 150" (380 cm)

With 60 LEDs/m strip:
380 cm ÷ 100 cm/m × 60 LEDs/m = 228 LEDsAdd 10-20 extra LEDs to account for corners and mounting. It’s easier to cover extras with tape than to extend the strip later.
Step 2: Install and Configure Hyperion
Hyperion.NG is the modern, actively-maintained version — use it over the discontinued Classic version.
Installation Options
Windows:
- Download from hyperion-project.org
- Run the installer and follow prompts
- Access at
http://localhost:8090
Raspberry Pi (HyperBian):
- Download HyperBian from GitHub releases
- Flash to microSD card with Raspberry Pi Imager
- Insert card and power on the Pi
- Access at
http://hyperbian.local:8090or the Pi’s IP address
Linux:
# Download and install
wget https://github.com/hyperion-project/hyperion.ng/releases/download/v2.0.15/hyperion_2.0.15_linux_x86_64.deb
sudo dpkg -i hyperion_2.0.15_linux_x86_64.deb
sudo apt-get install -f
Connect Hyperion to WLED
- Open Hyperion web interface (port 8090)
- Go to LED Hardware → Controller
- Configure the WLED connection:
| Setting | Value |
|---|---|
| Type | WLED |
| Host | Your ESP32’s IP address |
| Port | 19446 (DDP protocol) |
| Number of LEDs | Same as WLED configuration |
- Click Save
WLED supports multiple protocols. DDP (port 19446) is the recommended option for Hyperion.NG — it’s efficient and auto-discovers WLED devices on your network.
Configure LED Layout
- Go to LED Hardware → LED Layout
- Select Classic layout type
- Configure based on your TV:
Example for 3-sided setup (bottom + sides):

        [Top LED count: 0]
    ┌───────────────────────┐
    │                       │
    │   TELEVISION          │ Left ─────►  Right
    │                       │ 30 LEDs      30 LEDs
    │                       │
    └───────────────────────┘
Bottom: 60 LEDs ◄─────-
Set:
- Top Gap: LEDs at top of TV (or 0 if not using top)
- Right Gap: LEDs along right side
- Bottom Gap: LEDs along bottom
- Left Gap: LEDs along left side
- Direction: Clockwise or counter-clockwise (check with preview)
-
Use the visual preview to verify LED positions match your physical layout
Set Up Screen Capture
- Go to Capturing Hardware → Screen Capture
- Enable your capture method:
| Platform | Recommended Method |
|---|---|
| Windows | DirectX 11 or Desktop Duplication |
| macOS | OS X Framebuffer |
| Linux | X11 or Frame Buffer |
- Set Capture Frequency to 20-25 Hz (balance between responsiveness and CPU usage)
- Click Save
On macOS and Windows 11, you may need to grant screen recording permissions to Hyperion. Check your system privacy settings if the preview shows a black screen.
Step 3: Fine-Tuning Your Setup
Color Calibration
- In Hyperion, click the Magic Wand icon (calibration)
- Run through the color wizard:
- Display test patterns (red, green, blue)
- Verify each color appears correctly on your LEDs
- Adjust color temperature to match your wall
Fixing Wrong Colors
If red appears as green (or other color swaps):
-
Open WLED web interface
-
Go to Config → LED Preferences
-
Try different Color Order settings:
- GRB (most common for WS2812B)
- RGB
- BGR
- BRG
-
Test each by setting WLED to solid red, green, then blue
Different LED manufacturers use different color orders. There’s no “correct” setting — just pick whichever matches your strip.
WLED Settings for Hyperion Mode
To make WLED respond properly to Hyperion:
- Go to Config → Sync Interfaces
- Enable Receive UDP Realtime
- Set Timeout to 25000ms (25 seconds)
- Enable Force max brightness — ensures Hyperion controls brightness
- Save settings
When Hyperion sends data, WLED automatically switches to “realtime” mode. After 25 seconds of no data (you close the video, etc.), WLED returns to its normal effect/preset.
Adjust for Lag
If LEDs feel behind the screen:
- Lower capture frequency in Hyperion (try 15 Hz)
- Reduce smoothing time in Hyperion (Processing → Smoothing)
- Use wired Ethernet for the ESP32 (add an Ethernet shield or use an ESP32 with built-in Ethernet)
- Check WiFi signal strength on the ESP32
Troubleshooting Common Issues
LEDs Not Lighting At All
| Check | Solution |
|---|---|
| Power supply on? | Verify power supply LED/output |
| GND connected? | ESP32 and LEDs must share ground |
| Correct GPIO? | Match WLED config to your wiring |
| Data direction? | Check strip arrows — data flows one direction only |
| First LED dead? | Skip the first LED in WLED settings |
Random Flickering or Wrong Colors
This is almost always a signal problem. The ESP32 outputs 3.3V logic, but WS2812B expects 5V. Without a level shifter, the data signal is on the edge of not being recognized.
| Solution | Priority |
|---|---|
| Add a level shifter (SN74AHCT125) | High — do this first |
| Inject power at multiple points | Medium |
| Keep data wires away from power lines | Low |
| Check for cold solder joints | Medium |
Hyperion Can’t Connect to WLED
| Check | Solution |
|---|---|
| Same network? | Both devices need to be on the same subnet |
| Firewall? | Allow Hyperion through Windows Firewall |
| Correct IP? | Verify WLED’s IP in your router’s client list |
| mDNS? | Try direct IP instead of wled-xxxx.local |
| UDP enabled? | WLED needs “Receive UDP Realtime” ON |
Colors Don’t Match What’s On Screen
| Cause | Fix |
|---|---|
| Wrong color order | Change in WLED (GRB → RGB → try each) |
| Double gamma correction | Disable in WLED OR Hyperion (not both) |
| Blackbar detection | Adjust threshold in Hyperion |
| Wall color affecting light | Recalibrate white point for your wall |
Going Further
HDMI Sources (Game Consoles, Blu-ray)
To sync lights to external HDMI devices:
- Buy an HDMI-to-USB capture card ($15-30 on Amazon)
- Connect: Console → Capture Card → TV (pass-through) AND USB to PC
- In Hyperion, add USB capture as a source under Capturing Hardware
Look for capture cards that support 4K pass-through so you don’t downgrade your console’s output quality just for ambient lighting.
Multiple LED Setups
With Hyperion.NG, you can run multiple “instances” — perfect for:
- Dual monitors with separate LED strips
- Room lighting plus TV backlight
- Different color zones for creative effects
Each instance can have its own capture source and LED configuration.
Audio Reactive LEDs
WLED supports audio reactivity with a cheap microphone module:
- Add an I2S microphone (INMP441 or MSM261S4030)
- Wire to ESP32 (SCK, WS, SD, VCC, GND)
- Enable in WLED: Config → Audio → Audio Reactive
Your LEDs can now pulse to music even when Hyperion isn’t running.
My Setup (From The Video)
For reference, here’s what I’m running in my YouTube setup video:
| Component | My Choice |
|---|---|
| TV Size | 55” |
| LED Strip | WS2812B 60 LEDs/m, ~3.5m total (~210 LEDs) |
| Controller | ESP32 DevKit V1 |
| Power | 5V 15A switching supply |
| Level Shifter | SN74AHCT125 |
| Hyperion Host | Raspberry Pi 4 (HyperBian) |
| Capture | X11 screen capture |
The total cost was under $60, and the effect is genuinely transformative for movie nights and gaming sessions.
Quick Reference
Essential WLED Settings for Hyperion
| Setting | Value | Location |
|---|---|---|
| LED Count | Your total LEDs | LED Preferences |
| GPIO | 16 (or your wiring) | LED Preferences |
| Color Order | GRB (try others if needed) | LED Preferences |
| Brightness Limiter | ON | LED Preferences |
| Max Current | 80% of PSU rating | LED Preferences |
| UDP Realtime | ON | Sync Interfaces |
| Realtime Timeout | 25000ms | Sync Interfaces |
| Force Max Brightness | ON | Sync Interfaces |
Essential Hyperion Settings
| Setting | Value | Location |
|---|---|---|
| Controller Type | WLED | LED Hardware → Controller |
| Host | ESP32 IP address | LED Hardware → Controller |
| Port | 19446 (DDP) | LED Hardware → Controller |
| Capture Method | Platform-specific | Capturing Hardware |
| Capture Frequency | 20-25 Hz | Capturing Hardware |
Resources
- WLED Documentation — Complete WLED reference
- WLED GitHub — Source code and releases
- WLED Web Installer — Flash WLED from your browser
- Hyperion Documentation — Hyperion.NG docs
- Hyperion Forum — Community support
- QuinLED — Purpose-built LED controllers
Wrapping Up
Building your own ambient lighting setup is one of those projects that sounds complicated but comes together surprisingly smoothly. The combination of WLED and Hyperion handles all the heavy lifting — you’re really just wiring up an LED strip and pointing two pieces of software at each other.
The result? Every movie night, every gaming session, every YouTube video becomes just a bit more immersive. And for under $60, it’s one of the best bang-for-buck upgrades to your home theater setup.
Questions? Hit me up in the comments of the video or check the WLED and Hyperion Discords — both communities are incredibly helpful.
Take photos of your wiring before you mount everything behind the TV. You’ll thank yourself when you need to troubleshoot months later.


Comments
Powered by GitHub Discussions